Setup Multiple Static Websites on a Single Server Using Nginx Virtual Hosts
Efficiently Host Multiple Websites on One Server: Nginx Virtual Hosts Made Easy


Key Concepts Covered
Subdomains
Nginx Virtual Hosts routing.
Wildcard SSL (Let's Encrypt)
Prerequisite
Hey mate if you're here, and finding solution for multiple static website getting hosted on single server you're at right place. I'm hoping you have already one static site hosted on server and you're looking how to host another let's move forward.
If you need help how to set first static site on server go and visit my older article and then come here.
Let's move assuming that you're having one site working in server which denote's you have one working SSL, domain and least but not last server. 😀
Have your DNS point to server.
So, let's go on DNS ( Domain Name System ) provider's management console and point it to the Server's IP.
I'm using Namecheap for my domain, I went in their DNS management console and added two record, one for example.com and another one for www.example.com
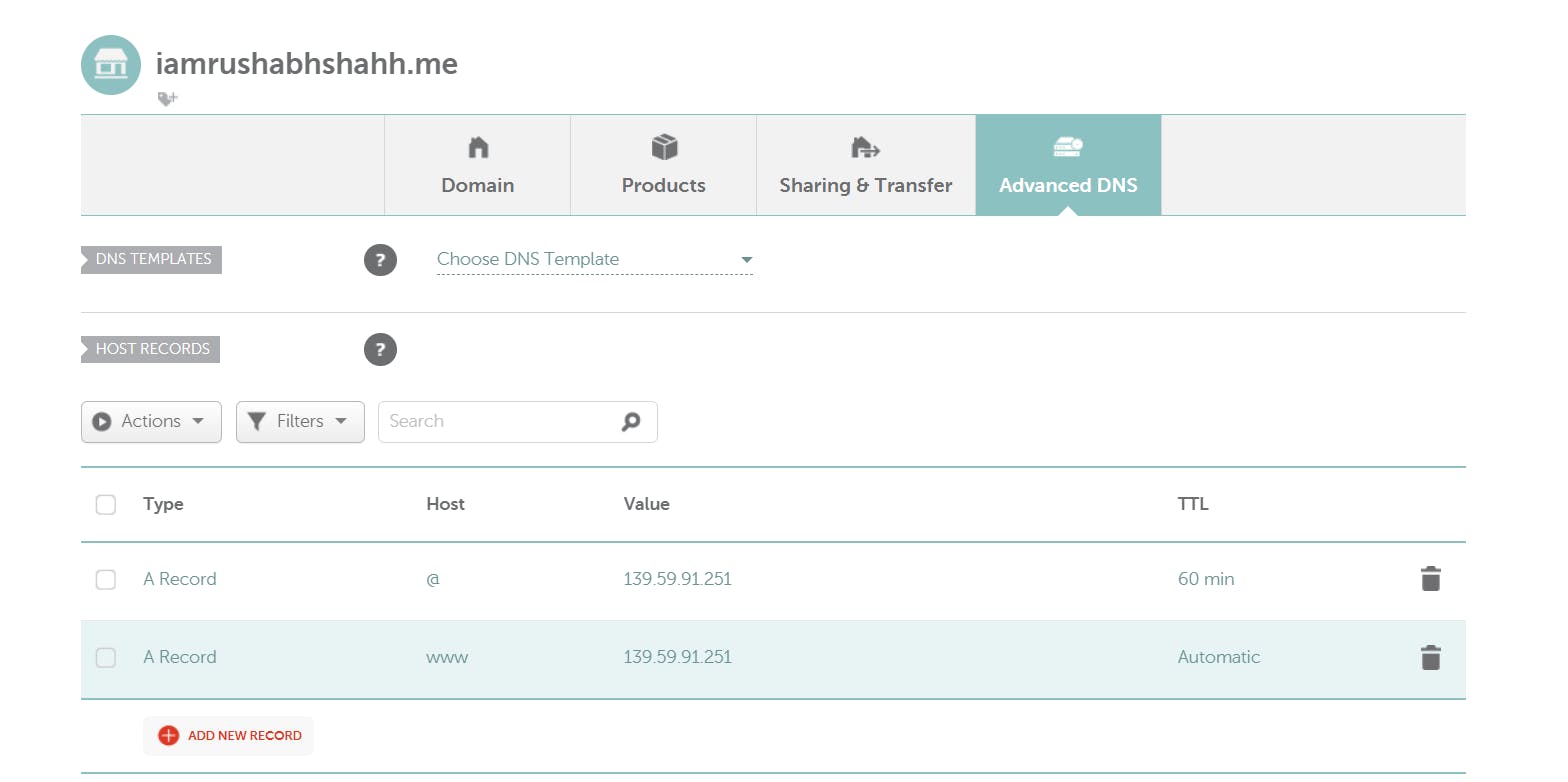
Now, for www you can either add cname record or else you can add A name record.
Clone the code in server
So, now let's clone the code in server and move it to perfect path.
For this I am using Static-Gallery Code, feel free to use it for learning or any kind of your purpose.
Now, let's clone the repo in /tmp directory. If you have user's home directory access you can use that too for clone. Then move it to /var/www/html and give it permission of Read, Write and Execute on user level.

Now let's move it to the desired directory.

As it already have all permission on owner level we are not giving it but if you don't and you have to apply the permission you can go with.
sudo chmod -R 755 <Directory Name>
Once you done with this we can go and configure the Nginx Server Config.
Create server config for website
On very first we have to create the file where we will write the config.
sudo vi <example.config> #You can pass the file name according to your project name
After this it will open the file editor, press I or i for go into insert mode and paste the below content then modify accordingly.
#This is the server block which help nginx to find files on base of Domain
server {
    listen 80 default_server;
    listen [::]:80 default_server;
    server_name example.com www.example.com; # Change this to your domain name or IP address

    root /var/www/html/YourFileName; #If you have differnt name of code file change it accordingly and remove Static-Site
    index index.html index.htm;

    location / {
        try_files $uri $uri/ =404;
    }
}
After this check the Nginx syntax by,
sudo nginx -t
Once you get the Success message as output, after that you can go and create symlink.
sudo ln -s /etc/nginx/sites-available/yourfile /etc/nginx/sites-enabled/
Now it's time to reload nginx,
systemctl reload nginx
Note : The difference between the restart and reload is that restart user might get affected but in reload nginx reload itself while maintaining the end user ( client ).
Now go and check in Browser, you will get your website live.

Now, as we see it's not Secure yet so, it's time to go and make it secure.
Binding SSL to website
Now if you're using single domain example.com and using it's alias like apps.example.com and blogs.example.com we have to use Wildcard SSL.
But as I used two totally different domain we can also go with the Normal SSL but we have covered SSL in last article so we will go with wildcard SSL.
First we have to install certbot. If you have already done in first configuration you can proceed with next step.
sudo apt install certbot python3-certbot-nginx
Now let's create SSL, while requesting wildcard certificate for your domain (replace example.com with your actual domain).
sudo certbot certonly --server https://acme-v02.api.letsencrypt.org/directory --manual --preferred-challenges dns -d '*.example.com' -d 'example.com'
After you hit this Let's Encrypt ask you to deploy a DNS TXT record under the given name. So, they can verify that Domain belongs to you.

You can go and add it in DNS Management console, add A record with given value and host.

Once you add this after that hit enter and yeah now you have wildcard SSL by Let's Encrypt.
Now let's configure it in our Config file.
To set this up you have to add few thing's in config file, either you can add server block or you can add it in same server block.
server {
listen 443 ssl;
ssl_certificate /etc/letsencrypt/live/example.com/fullchain.pem;
ssl_certificate_key /etc/letsencrypt/live/example.com/privkey.pem;
ssl_protocols TLSv1.2 TLSv1.3;
ssl_ciphers 'ECDHE-RSA-AES128-GCM-SHA256:ECDHE-RSA-AES256-GCM-SHA384:DHE-RSA-AES128-GCM-SHA256:DHE-RSA-AES256-GCM-SHA384';
ssl_prefer_server_ciphers on;

#Other content of server config
# MAKE IT EASY TO READABLE
}
Now, once you add this you proceed with the next process of checking syntax and creating symlink.
sudo ln -s /etc/nginx/sites-available/example.me /etc/nginx/sites-enabled/
Now check syntax
sudo nginx -t
Reload the nginx server
sudo systemctl reload nginx
Validate the website SSL using the OpenSSL utility.
You can use the Command Line Utility and check the SSL certification.
openssl s_client -connect *.example.com:443
Once you enter this you'll get output like this.
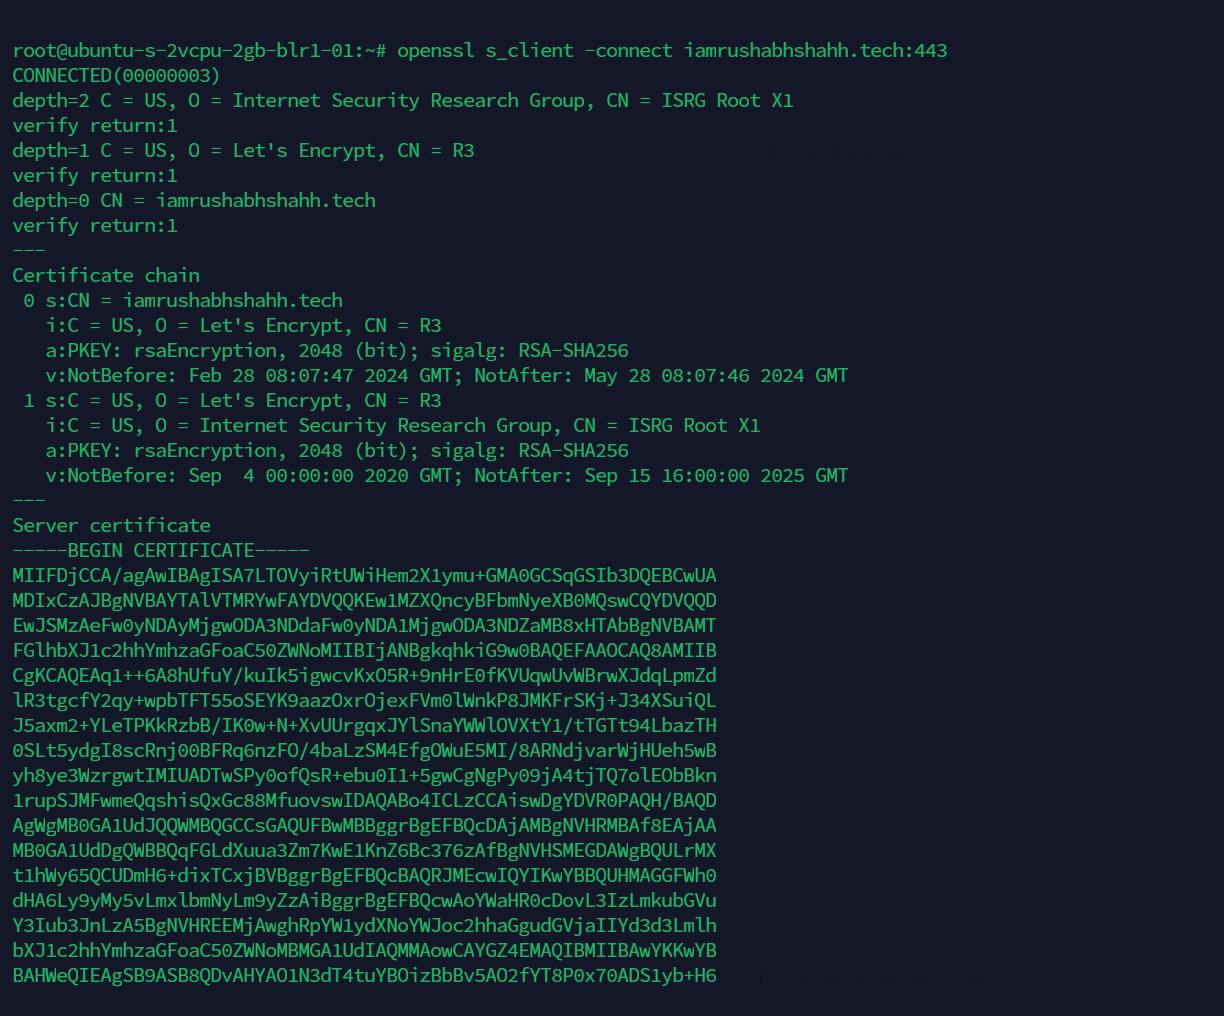
You can find details related to Certificate in this take a time and give it a look.
Let's check now in browser that our SSL is visible or not.

Congratulations, mate you successfully deployed multiple website in single Nginx server and also configured the Wildcard SSL certificate onto it.
Conclusion
In conclusion, hosting multiple static websites on a single server using Nginx virtual hosts is a powerful and efficient way to manage your web projects. By following the steps outlined in this guide, you can easily configure Nginx to serve multiple sites, each with its own domain and SSL certificate. This approach not only simplifies your server management but also improves the security and performance of your websites. I hope this guide has been helpful, and you can now confidently host multiple websites on your Nginx server. Happy hosting!
Connect with me
Let's connect with me on Social Media